I visited my parents the other month, and was given the heads-up before I drove up there (so I could bring the appropriate tools with me) that Mom wanted me to construct a clothesline for her while I was there. I had a rough idea about what she wanted, and was able to construct a clothesline setup for under $50.
Materials List:
2 each: 4″x4″x8′ Pressure-Treated posts
2 each: 2″x4″x8′ Pressure treated board
10 each: eye bolt assemblies (bolt, nuts, washers)
3″ deck screws
3 bags of post-setting concrete (I purchased 4 “just in case”, and was able to return one)
100′ of clothesline
This is a very basic project, and the hardest part was digging the holes. I dug two holes to a depth of 2 feet, having a diameter of about 8″ (maybe 10″-12″ at the top, but that was only because the post-hole digger handles kept knocking the edges of the hole as I was digging deeper). I measured off of the house to make sure the line was “straight” (maybe I’m a little obsessive about things like that), and started digging. First hole, no problems encountered, but the second hole I had to relocate after digging down less than a foot – there was a large stone in there that I was not equipped to remove.
I set the posts in the holes, used a level to ensure true vertical placement, and braced them with scrap lumber that I found laying around.
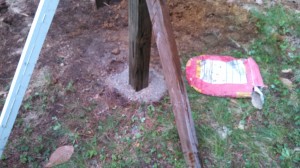 The cement that I chose to use was a no-mixing-required type (marketed for setting fence posts or mailbox posts). All I had to do was to dump it into the hole around the post, add water and that was it! I double-checked the posts with the level to ensure they were still perfectly vertical, then left the posts braced in the curing cement overnight.
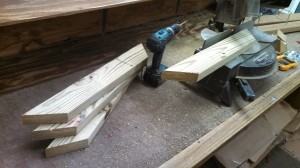 I cut one of the 2x4s into four 2-foot lengths, cutting each end at 45º. Even if the overall measurement of this piece is not exactly 24″, it is more critical to ensure that all four pieces are exactly the same length.
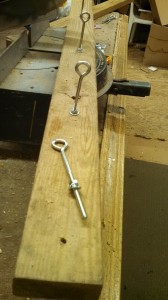
The other 2×4 was cut exactly in half, and I drilled 5 holes on each board to accommodate the eye bolts. Remember that the bolt in the middle will need to be offset, since the 2×4 will be attached on center to the 4×4 post.
I used eye bolts that were long enough to go through the 2×4 (each bolt came with one nut), and purchased two fender washers and an additional nut for each bolt.
I assembled each cross-piece before attaching them to the posts. The two 45º cuts butt up to each other to form a 90º joint which I used deck screws to secure. I then centered these to the long board (containing the eye bolts) and secured them with deck screws. (I had a picture of this assembly by itself, but I accidentally deleted it after it was too late to retake the picture. I am still not totally familiar with the way my new phone handles pictures – oops!)
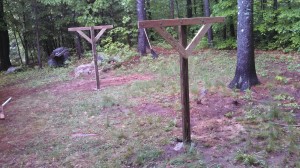 The assembled cross-pieces were attached flush with the top of the post, and secured with several deck screws. I mounted the cross-piece assemblies on the outside of the posts for a couple of reasons (which seemed good enough to me at the time that I was deciding which side I wanted to mount them on!). First of all, it gave an extra 8″ of line space. Second (and probably more importantly), the weight of the lines will be pulling in on the crosspieces, rather than pulling them away from the upright.
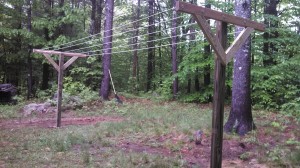 The finished project! I had originally planned to cut rope for each line, and using the threads on the eye bolts to adjust the tension on the line. Instead, I wound up just stringing the rope from one and looping it back around to the next. I ran an extra length of rope through the ends of all 5 lines, figuring that would give Mom a place to hang small items, or the bag that held her clothespins…. but mostly it was a way to make the fact that the line was one continuous “zigzagged” rope (instead of being five individual lines) a little less obvious.
I haven’t had any feedback from Mom about the clothesline setup, but I suspect that it may be sagging a bit – the line that I purchased was the cheap vinyl-coated version that sold 100′ for $7. I noticed afterward that it was rated for a 14-pound load. Don’t skimp on the rope!


