We had the idea that we would like a mirror made up of mirror tiles in a frame, but since we are renting our home right now, I didn’t want to do the “easy” method of gluing the tiles to the wall and then attaching a frame around them. I decided that I would like to build a framed mirror that I could hang on the wall. It would not become a permanent feature of the house, so we can take it with us when we move to our final home.
I found a few articles online about making the type of mirror that I had envisioned, but all of them involved attaching the tiles directly to the wall in some way. I could not find any articles about constructing a framed mirror that was not permanently attached, and the lack of information actually inspired me to create this website as I constructed my own mirror.
The idea has been on the back burner for a long time, but with my wife’s decision to redecorate the living room, the project got bumped up on the priority list. We went shopping at Home Depot and got all of the materials that we needed, and I got to work!
We saw similarly sized mirrors for sale for under $100, but they were very plain: square frames, no bevel to the glass. We wound up spending about $120 in materials, and I put in about 8 hours of effort into the project, but we got one large (2’6″ x 4’6″) mirror, plus 4 smaller mirrors (made from individual tiles). If we had decided not to make the 4 small mirrors, the project could have been kept under $100.
I used 1/4″ underlayment for the back, crown moulding for the frame on the big mirror and small decorative trim (appliqué) for the frames on the smaller frames. The smaller frames were actually more of a challenge than the large frame, since the detail work required more planning when cutting the angles, and with the details in the trim, it took more effort to get an even coverage while staining.
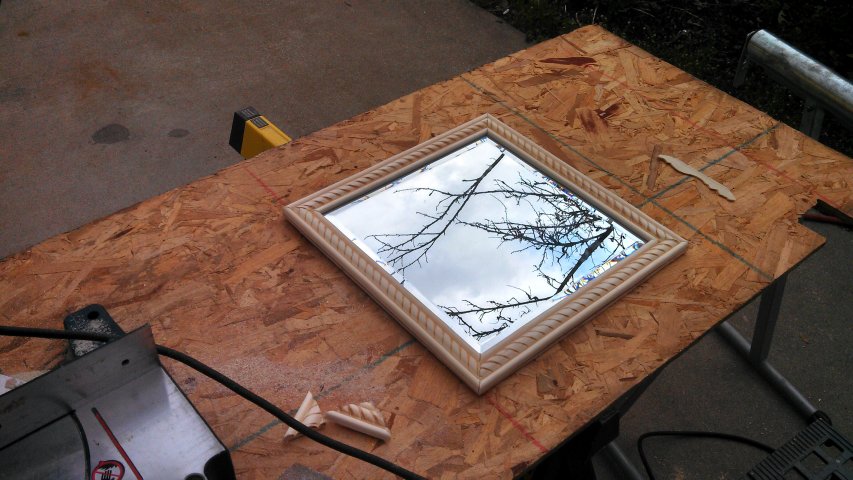
The first step was determining the size that the mirror back would need to be cut.
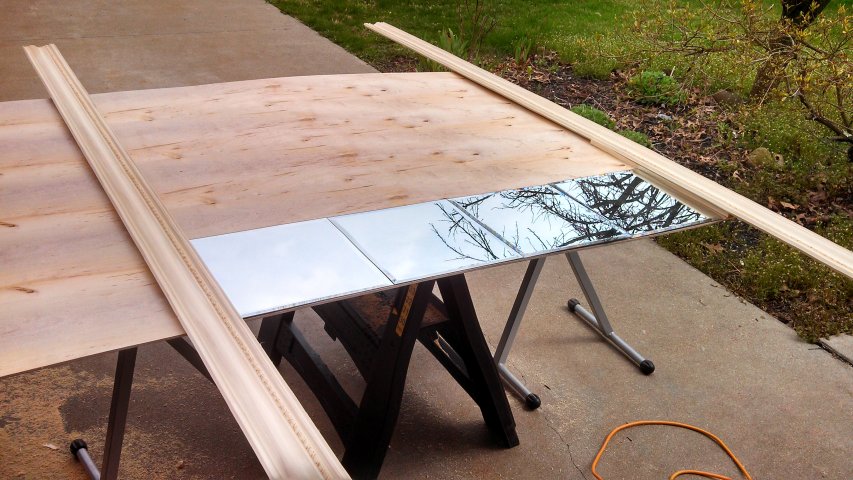

I laid the mirror tiles and the trim down to determine the final dimensions. I made sure everything was square, then traced along the trim where I needed to cut the board for the mirror back.
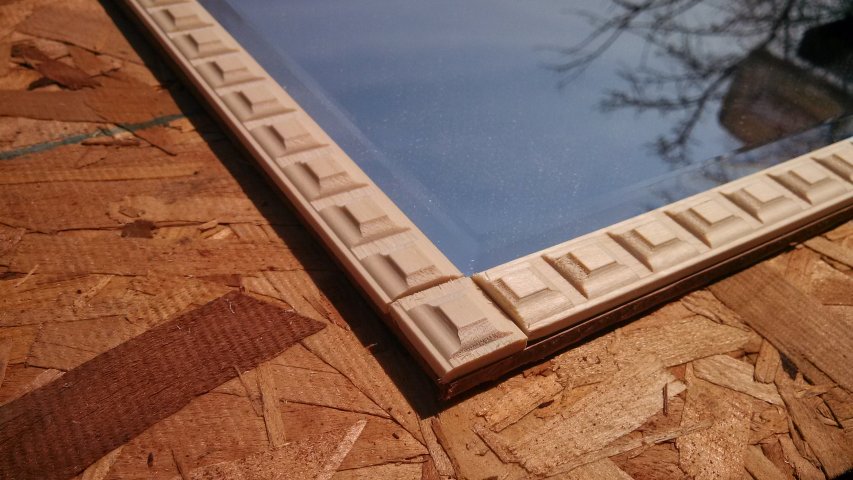
I realized during this process that by purchasing the crown moulding instead of a moulding that was made specifically for framing, there was going to be a gap between the edge of the mirror and the trim, where it is cut at a 45° angle (see picture above on the right).

I did not want the bevel to disappear behind the trim, and I didn’t want the gap to be visible on the finished mirror. To fill the gap, I ripped some triangular strips out of a clear pine board that I had laying around. This was a tedious process that involved modifying a sled for the tablesaw, and going back and forth between the sled with the blade set at 45° and the fence with the blade set straight. I think that it was worth the extra effort, and I really like the way that the finished mirror turned out, but if I had to do it again, I would likely shop for moulding that was made for framing a mirror!
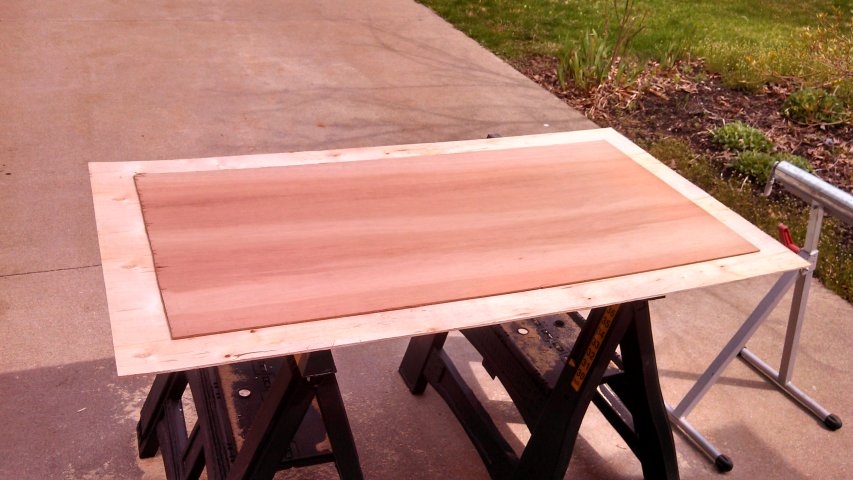
I cut a second piece of underlayment to fit behind the mirror tiles (but not going behind the frame). This adds stability to the mirror, and brings the tiles a little further out in the frame.
Next, I cut the moulding to fit around the mirror area.

One of the first things that you should learn about a chop saw is that you should never trust the factory preset angles. Ensure that your blade is at a true 45° angle before cutting. For safety’s sake, unplug the saw before working this close to the blade!
After everything was cut, it was time for a final test fit before gluing anything. Clamps come in very handy for the next few steps.

Once I was happy with the fit of the frame, I made sure that the second piece of underlayment was placed where I wanted it. I then removed the frame, making sure not move the underlayment.

Again, making sure not to move the underlayment, I traced it’s position onto the larger piece behind it. After everything was marked, I pulled up the smaller piece.

I used a little bit of some all-purpose construction adhesive that I had left, which wasn’t quite enough, so I had to also use some wood glue to bond the two pieces of underlayment together. I left the two pieces with weight on them overnight to cure.
After the two pieces of underlayment are fully cured, it’s time for another test-fit. This time, I was making absolutely sure that I was happy with the way that the frame was coming together.


This is my last chance to fine-tune the way that the corners butt together. I tend to be a little bit perfectionistic, so if my corner lined up as in the above picture, I would certainly not be happy with the finished project! I was able to get everything to line up just right before nailing and gluing the frame.

I positioned the frame where I wanted it to be and clamped it there while I nailed the corners of the frame together. I used my finish nailer with 2″ nails. A total of 8 nails were used, one going each way at each corner (similar to the way casing is nailed to itself around a door or a window). Be careful to make sure the nail goes into the thickest part of the frame. I had one nail drift through the surface of the trim, nailing my clamp in the process! After removing it, a little bit of stainable wood filler fixed that mistake.
Once the frame is nailed together, I laid the mirror tiles out on the mirror back to get a feel for how the frame would need to be placed to keep everything even. Wood glue was used again to attach the frame to the backboard, and after final positioning, it was clamped as the glue cured. I removed the mirror tiles and glued the triangular strips in place at this time. I also filled in a few voids (like, where a stray finish nail was removed and left a hole) with stainable wood filler, and left the whole unit to set overnight, giving everything adequate time to cure.
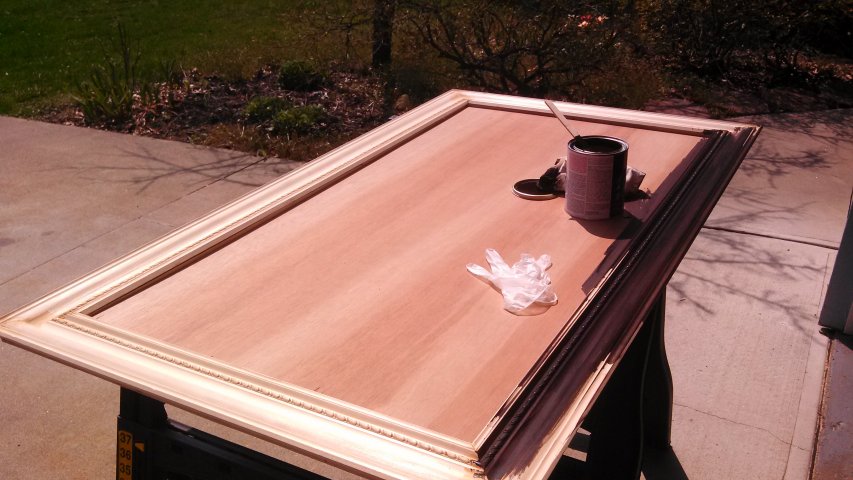
Now for the color! As soon as I started staining, the cloud cover went away and I was in the direct sunlight. This made things a little more challenging; in retrospect, it wouldn’t have been too difficult for me to move my sawhorses so I could back the car out and set up to stain in the garage. I would recommend staining in a garage or under some sort of cover! The sun dried the stain almost as soon as I could put it down, so I had to be careful to apply the stain very evenly, because after a minute in the sun, there was no “excess stain” to be picked up. The glare from the sun also made it difficult to see if I was getting the stain into all of the details on the trim.
I used an old t-shirt to apply the stain. I also had a brain-dead moment and didn’t put any type of gloves on for the first 2 feet of staining. They call it “stain” for a reason – there is still a hint of kona tint around my fingernails, two weeks later! Even the latex disposable gloves that I had did not stand up to the task, and only protected “most” of my hands by the time I was done. A little paint clean-up solution got most of it cleaned up before it became permanent on my hands. All that to say: have some heavy-gauge gloves handy before you start staining!
After one more overnight setting, to allow the stain to dry, it was time to put the mirror tiles in. Before adhering the tiles, I set the eight tiles in place and positioned them where I wanted them to be. One at a time, I lifted the mirror tiles and placed three vertical 8″ beads of mastic down on the backboard for each tile, pressing the tile and wiggling it slightly to get good adhesion. I’m not sure if the wiggling is necessary, I just did it because that’s how I’m used to installing ceramic tile on mortar.
I tried to get each tile lined up where it needed to be, before moving on to adhere the next tile. I have seen beveled tile mirrors in the past that have been glaringly out of alignment, and that was not the effect that I wanted to achieve! After all 8 tiles were adhered, I spent quite a few minutes “tweaking” them to get them where I was happy with the alignment.
One tube of mastic was enough for me to attach two cases (12 tiles) of the mirror tiles. This was my first time working with mirror mastic, and I was not sure how long was necessary for it to cure, so I left it overnight again.
After I was sure the mirror mastic had dried, I turned the mirror over to install the frame portion of the french cleat.
Not only was this my first time using mirror mastic, but this is also the first time I have ever used a french cleat. I am definitely a fan! The one that I purchased is long enough to span two studs, rated for up to 200 lbs capacity, and you have a few inches of “play room” to center the mirror exactly where you want it, without having to move wall hooks! There is only a 1/4″ gap between the back of the frame and the wall, which was important since any other type of mounting hardware would have had the top of the frame hanging 1/2″ or more from the wall by the time I put wall hooks and sawtooth hangers or eye hooks with heavy-gauge hanging wire.

This portion was easy to install. Making sure to keep it straight with the top of the frame, I centered the cleat and used a hand screwdriver to put all 5 screws provided into the thickest part of the crown moulding. That way, the weight of the unit is being borne by the sturdiness of the moulding, rather than just the underlayment.
The wall portion of the french cleat is long enough to reach two studs, and I went ahead and put the other three provided screws in with anchors, although with the two screws anchored into solid wood (studs), that was probably overkill.
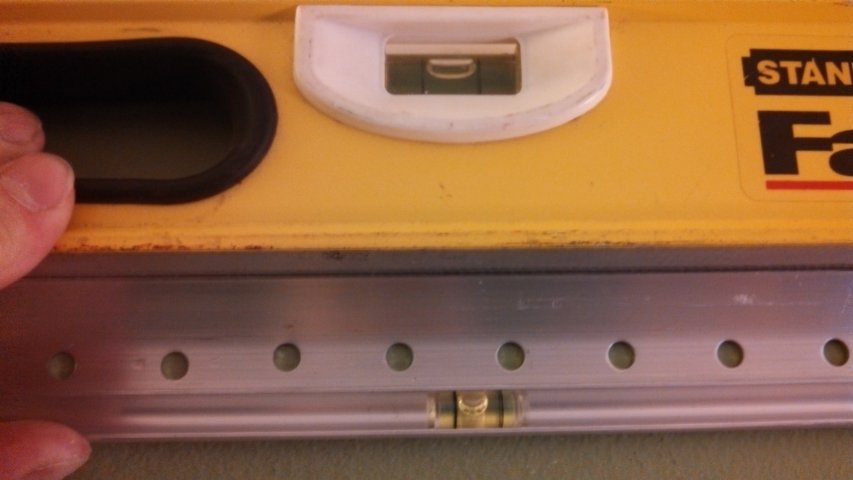
I would recommend against using the little level that is included with the cleat. I suspected that it was not trustworthy when I placed it in the cleat and leveled the cleat according to the bubble. Rotating the bubble tube moved the bubble to the other side of the line. Even though it probably wouldn’t make a noticeable difference, I knew that it wasn’t level (and that would have bothered me!), so I grabbed my own level for the job (see photo above). If you don’t have an accurate level handy, then I suppose the little one they give you would work better than nothing!
The packs of mirror tiles came in bundles of 6. I needed 8 for the large mirror, so I had to buy two packs, which left me with four tiles to make little accent mirrors with. I used the same technique for these as I did for the large mirror unit, except that I did not double the layer of underlayment behind the mirror, and I did not nail the trim.

Where the crown moulding was proportioned right for the large mirror frame, I found some appliqué moulding in the same aisle at Home Depot that we liked for the smaller frames. Just a word of caution (from my experience): think about how much work will be involved to make the pattern line up! The profile below was a challenge because it did not line up to allow a simple 45° miter joint. I had to center the trim on each side and cut off enough to allow me to fit one “square” in each corner. Once it was sanded, glued into place and filled a little bit with stainable wood filler, it didn’t look so bad, but I wasn’t sure that I was going to be able to pull it off!

Staining the small appliqué trim was also a challenge, as there was a lot of detail that needed to soak in the color. I wound up going over the trim with a second coat of stain. The edges of the plywood are also visible on the sides of the small frames, so extra attention had to be taken to make sure the color was even between the plywood and the trim.

I didn’t get any photos of the tiles being glued into the large frame, but this shot shows how I laid down the mastic for each tile. The directions on the tube specified two beads per tile, I was able to put 3 beads down (figured an extra would not hurt) and had enough to put down all 12 tiles for this project, with some left in the tube when I was done.
I used eye hooks and picture hanging wire for the small mirrors, and put two wall hooks up for each mirror (not so much for weight, as these mirrors aren’t heavy – but because it is easier to level the mirror with two hooks holding it). I made sure that the eye hooks were put into the thickest part of the trim, making sure not to go all of the way through the trim (it is thin material).
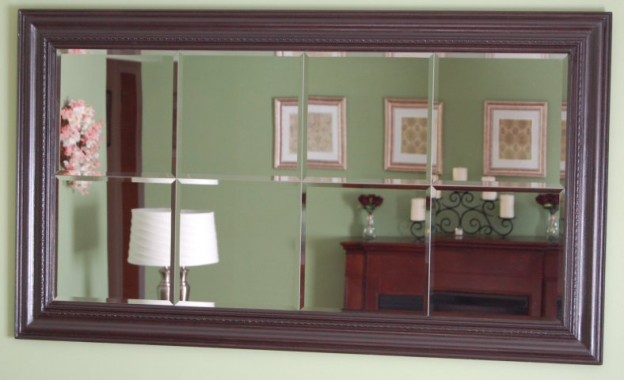
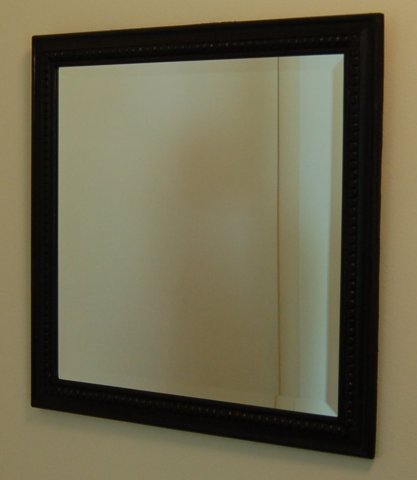
The finished mirrors:

- Finished large mirror
Finished 1×1 mirror, trim profile #1

Small mirror frame profile #2

2 small mirrors, trim profile #3

Frame detail on 2 small mirrors